Belt Ratting

After the last post explained the theory of fitting a ratting ship, I want to give you an example how to put that knowledge into practice and do some belt ratting.

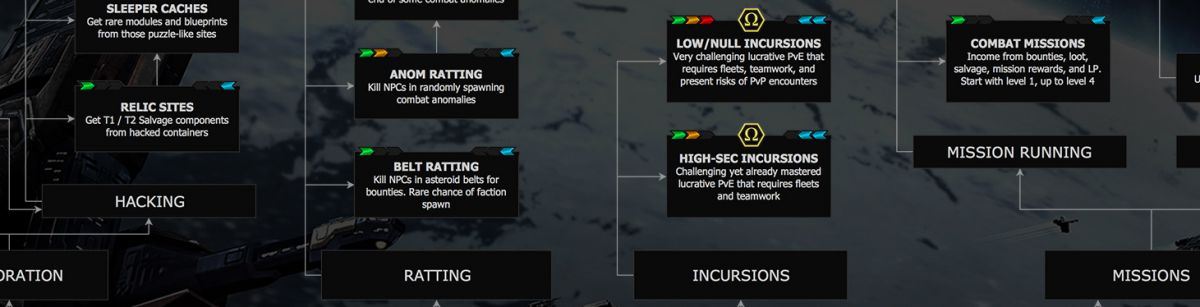
First thing you need to figure out is where you are going to rat. Since the biggest NPC bounties are paid out in null sec, it is highly recommended to find a corporation that occupies some null sec systems to rat in. The easiest choice for this – as far as I know – is to join Pandemic Horde or Karma Fleet, both alliances that accept any new player, no matter how little ISK and skill points you have.

I ratted in Pandemic Horde space for this guide, who currently live in Geminate null sec. A quick Dotlan check shows, that Geminate is inhabited by Gurista NPCs , who mostly deal kinetic and thermal damage and have a low resist against the same damage types.

The Belt Ratting Catalyst

Belt ratting involves a lot of warping around belts, so you want a ship that warps relatively fast and can deal lots of kinetic/thermal damage. Blasters are a good choice to deal these damage types, so the ship of choice could be either a Catalyst or Cormorant. which both have bonuses to small hybrid weapons. I picked the Catalyst for my ratting fit, because it deals more damage than the Cormorant. Another good choice would be the Algos, which  additionally has a drone bay. However, the Algos requires you to skill into a second weapon systems (drones in addition to hybrid turrets) and does less damage than a Catalyst. For beginning players with little skill points the Catalyst might be the better choice, but that is just my personal opinion. I also added a Algos fitting in the end of this post. 

After a quick PYFA session, I came up with the following Catalyst fit:


Click here for a text version of the Catalyst fit
[Catalyst, Belt Ratting]

Magnetic Field Stabilizer II

1MN Monopropellant Enduring Afterburner
Medium F-S9 Regolith Compact Shield Extender

Light Ion Blaster II, Antimatter Charge S

Small Anti-Thermal Screen Reinforcer I
Small Polycarbon Engine Housing I
Small Anti-Kinetic Screen Reinforcer I

Antimatter Charge S x10000
Void S x10000


Highslots:  Lots of Light Ion Blasters. Best if you can use the T2 version, because it does more damage and can use Void S ammo, which deals more damage against battleships, but T1 blasters will work great too.

Mid Slots: An 1MN Afterburner to increase speed and mitigate incoming damage from battleship NPCs. I use a meta Medium Shield Extender for a shield buffer tank. Since we deal only with a small number of  NPCs ships in belts, we don’t need a ton of buffer to finish it. A buffer tank is also easier to use for new pilots than an active tank, because it does not need to be activated.

Low Slots: As many Magnetic Field Stabilizer as you can fit, to further increase the damage. If your fitting skills aren’t great, you could fit a Micro Auxiliary Power Core to get more power grid if required.

Rig Slots: Two Small Screen Reinforcers (kinetic and thermal) to increase your resists against Gurista specific damage types and a Polycarbon Engine Housing to increase speed.  If you notice that you haven’t got enough buffer tank to run belts with a lot of cruisers, replace the engine housing with a second kinetic screen reinforcer or a small core defence field extender.

Ammunition: lots of Antimatter Charge S and also Void S, if you can use T2 blasters. Use Void  against the battleships and Antimatter against cruisers and frigates.

This fit results in 400+ dps with Antimatter loaded (550 with Void), goes around 750 m/s and has more than 4k HP against kinetic damage depending on skills. It costs around 17 mil in Jita at the time of writing.  You can easily  replace the T2 modules by T1 meta versions if you don’t have the skills yet or to save some ISK on the fit.

How to fly it

To belt rat in this ship, you will need to check the asteroid belts in your system of choice for NPC rats. Warp from belt to belt and kill all the rats. Battleship wrecks sometimes contain good loot that you should take. The smaller wrecks aren’t usually worth the time looting. When you finished all belts in a system, move to the next system.

If you encounter rats in a belt, the basic idea of the catalyst fit is to close in fast and orbit the NPC ships at 500 meters with your afterburner switched on all the time. Always kill the smaller ships first, before dealing with the battleships. Since you are too fast for the battleships to hit you properly, the only dangerous ships will be the cruisers and battlecruisers, which you should kill first. After these, kill the frigates and finally deal with the battleships. Your buffer tank only needs to hold until all cruisers and battlecruisers are killed. After that, it will slowly regenerate, while killing the battleships and frigates that deal very little damage to you. Very rarely, the frigates in asteroid belts will scram and web your ship. If so, kill these frigates first before moving on to cruisers.

Some of the Gurista ships will use ECM against you, which can seriously slow you down killing them, so it is best to avoid belts with too many jamming ships.

Running belts in Horde space

So, I moved one of my subcap characters into Pandemic Horde staging system and bought myself a T2 fit Catalyst. From there, I mostly checked the belts one or two jumps off Horde’s current home system which is O-WVPB.

Most belts are quite easy to clear if you stick to killing cruisers first and battleships last. There were very few groups of NPCs in some belts, which I could not handle in the above Catalyst fit. The biggest thread are definitely  hostile players, who frequently roam PHs home regions.  

The jamming gurista ships can also be a pain, who can in groups sometimes permanently jam you. I encountered two belts with too many ECM cruisers and battleships to clear them. If you encounter more than two ECM ships in the belt, it might be best to pick another than spending minutes jammed.

So I kept an eye in D-scan for hostile ships and ratted for around seven hours in total.

Now to the important part: What was the total income? During this seven hours I made 71 mil ISK in bounties and 25 mil ISK in loot, which results in around 14 mil ISK per hour. This amount is after Horde’s 10% ratting tax,  includes short times of staying docked when hostile player fleets passed through system, and to bring back loot to my home station and buy new ammunition. I needed about 7k in ammo per hour, so bring plenty. The loot was sold to one of Horde buyback programs, which paid 90% of the Jita buy value for it within a couple of hours. Some of the loot I got from wrecks that were already in the belts when I arrived and I also looted a couple of player wrecks that were less fortunate than me while belt ratting.

This amount of income is not the greatest, but  – as a beginning player – a lot more than you can earn by running low level high sec missions or mine in a venture. I roughly made 100 mil isk after these ratting sessions, which is enough to buy a Vexor Navy Issue (VNI) and start to run cosmic anomalies. So stay tuned for the next  part of this guide and my experiences with anomalies.

Bonus content:

The Algos also has drones, which still fight even when jammed by an NPC. Furthermore I fitted a Sensor Booster with ECCM script against jamming, which works great.  Other than that, this fit is very similar to the Catalyst. However, is does less damage and is slower than the Catalyst.

Algos Fitting
[Algos, Belt Ratting]

Drone Damage Amplifier II
Magnetic Field Stabilizer II

1MN Monopropellant Enduring Afterburner
Medium F-S9 Regolith Compact Shield Extender
F-90 Compact Sensor Booster, ECCM Script

Light Ion Blaster II, Void S
[Empty High slot]

Small Polycarbon Engine Housing I
Small Anti-Kinetic Screen Reinforcer I
Small Anti-Thermal Screen Reinforcer I

Vespa II x2
Hornet II x3

Antimatter Charge S x10000
Void S x10000

Introduction to Ratting

According to EVE’s monthly economic report, which is provided as a dev blog by CCP Quant each month, ratting is the biggest source of income for capsuleers in the game. Each monthly economic report contains a bar chart that shows the sinks and faucets of ISK entering or leaving the game. By far the biggest faucet with more then 60 trillion ISK per month are bounty payouts gained by killing NPC ships of the pirate factions, also referred to as ratting.

The bounty for killing a pirate NPC varies with the size of the enemy ship and the security rating of the system you are in. Frigates will result in the smallest amount of bounty, while battleships will earn you the biggest reward. 

The monthly economic report also includes a chart that shows the security rating of the systems, where these 60 trillion isk are generated. Looking at this chart , you will see that more than 90% of the bounties are earned in zero security space.

So, it looks like that the most common way of making ISK in EVE is shooting NPCs in zero security space.

Where I can find these pirates?

The first thing you need to do to make ISK ratting is to find NPCs to kill in decent numbers. There are two main locations in every system in EVE where NPC pirates might be located: Asteroid belts and cosmic anomalies.

Asteroid belts often contain a small number of ships that can be killed relatively easily as a solo player in a well fitted destroyer. Usually you will encounter 1-2  battleships with 2-3 frigates or cruisers as support.

Cosmic anomalies contain a larger amount of ships that warp in in separate waves and are much harder to finish. A Guristas Haven anomaly contains up to 30 battleships with the same number of support cruiser and frigates, which warp in in six separate waves. 

For a beginning player it is easier to start ratting in asteroid belts to make some ISK and gain some experience before changing to the harder cosmic anomalies. To clear an anomaly from NPCs requires a much more skilled character and more expensive equipment. Furthermore the risk of losing your ship in an anomaly to the NPCs or a hostile player is much higher without  proper experience. But before we go into the details of running asteroid belts, I will give you a brief overview on what to keep in mind when designing a ratting fitting for your ship.

How to fit a ratting ship

The fitting of every ratting ship tries to maximise three aspects of the ship: tank, speed and damage.

Tank: The ships needs to have a proper amount of hitpoints (tank) to survive the damage done by NPCs until they are killed. This can either by an active tank, which replaces the lost hitpoints done by the NPCs, or a buffer tank, which maximises the amount of hitpoints of the ship. Most ratting fits use a shield based tank because  shield HP regenerate automatically over time without the need for repairs. This is very important for a buffer tank, since there might be no repair facility close to where you run your belts or anomalies. Furthermore, shield based tanks use the ships mid slots for tank and leave the low slots free to fit damage increasing modules. An armor based tank needs the low slots for tank and therefore deals less damage than a shield tanked ship.

Speed: Another point to consider is the speed of your ship. The faster a ship moves in space, the less damage will be applied to it by NPCs. So the amount of active or passive tank required will decrease for a faster ship. An exception to this rule is the use of Microwarpdrives, becaue MWDs increase your signature radius which make it easier for NPCs to hit you. This is why ratting fits mostly use afterburners to increase speed.

Damage: The last and most important point to look at is the amount of damage a ship does to an NPC, which is measured in damage per second (DPS). The more DPS you deal, the faster you can kill the NPCs and collect bounties from them.  As a general rule, the bigger your ship the more DPS it could do to a target. However, this amount of damage is modified by a number of factors that need to be considered for the ship fitting.

Bigger ships usually use bigger guns which apply less damage to smaller targets. When a battleship shoots at a frigate the amount of DPS that is applied to the frigate is much smaller than the amount the weapon system could inflict to a bigger target. If the NPCs are mostly small and medium sized ships, it might in fact be better to fly a smaller ship with smaller guns to apply more damage.

The second factor is the range of the weapon system. If a target is too far away for a weapon system, the amount of DPS is lowered to a point until no damage is applied at all to the target. In general, short range weapon system can deal more damage to a target than long range system, but the firing ship needs to be much closer to it. It is a common mistake to only look at the raw DPS of a ratting ship but to forget that you need to get very close in order to apply that amount of damage. So a long range weapon system with less DPS might actually be a better choice than a high DPS short range weapon system.

Finally the amount of damage is modified by the resists of the enemy ship against the damage type of the ammunition you use. So to maximise your DPS, you need an ammunition that deals the damage type against the lowest resist of the NPC. There is a good overview of NPC resists on this Wiki page of Eve University. Angel Cartel NPCs for example have weak resists against explosive and kinetic damage. To pick the right ammunition against the low resist, use the following Stay Frosty infographic, which compares the damage types of each ammunition for all weapon systems.

This should cover the basics of how to fit a ratting ship properly. In the next section of this guide I will show by a practical example how to apply these guidelines to fit a belt ratting destroyer and fly it into glorious combat against Gurista pirates.

Career Changes

Eve Online is a fascinating game that can bring the best or worst out of people. A starting player is presented with an overwhelming amount of game play options, from being a peaceful miner in high-security space to a ruthless pirate running gate camps in Tama and preying on the weak.

Even after a couple of years in the game there are always activities one has never tried, and even inside someone’s area of expertise things are changing frequently because of CCP’s many updates and tweaks to the existing game mechanics. I am playing this game for around six years and still have moments when I discover new interesting things to do or play styles that I would have never thought of.

A good start for beginning players to choose their career path is the famous “What to do in EVE”-Infographic, which categorises a great number of activities a player can perform and rates them in terms of difficulty and funds required. I recently found the updated version of the page and were surprised how many new things had been added that I never have done in my EVE career.

This was when I had the idea to change my personal game play, which has stagnated a bit over the last two years. People always tend to do what they can do best, so I was basically performing the same in-game tasks every week, which was mostly trading und small gang PVP. So seeing all these new exciting thing on the updated version, I though: Why not start to try all these different options and see how I like new areas of the game? Some activities I have done in the past but a lot has changed in the game since I was actively flying mining Ospreys. Now apparently mining Rorquals seem to be a thing.

Together with my decision to do things differently came the idea for this blog. The main goal will be to document how to start these different careers, explain the basics game mechanics which involve them and to share my opinion how much fun it is playing in that particular way.

In order to do this, I will try to write about three topics for each new career I will engage in:

  • What skills and equipement is needed 
  • The basic game mechanics for the activity
  • My personal opinion on it and experiences that I made

I will mostly focus on the careers mentioned on the “What to do..”-page, but will try to further break down some of the activities that I feel are to wide in scope to be covered in a single blog post.  To spice things up, the activities will be equally PVP and PVE related, ideally alternating between the two.

I hope this is going to be a somehow useful resource for both beginning players and veterans and also a good reason for me to write about this game that we all love so much.