Security Missions Part II

Level 3 Security Missions

After a rather long grind of 28 level two missions, I finally unlocked a level three agent for the Transstellar Shipping corporation. While level two mission felt rather easy, the level three one’s step the difficulty quite  up a bit. The NPC ships to destroy are now mostly cruisers and battlecruisers, which deal a significant amount of damage. To deal with these in a timely fashion, you will need a properly fit battlecruiser with more or less decent skills trained. From level three missions on, any amount of skill points and ISK you put into your mission ship will greatly reduce the average completion time for missions and hence the overall payout.

The Mission Boat

I used the following Drake fit to run all my level three missions:

Passive Drake Fit

In the high slots, I put a full rack of ‘Arbalest’ Heavy Missile Launchers ’ loaded with Scourge Heavy Missiles. This gives you, even with low SP, a decent range to stay far away from enemy ships. This will help you to mitigate a lot of the incoming damage in the missions. Since, the Drake has a damage bonus to Scourge Heavy Missiles, I only ever used these. You can maximise your damage with other missile types, which will be explained further down the post.

In the mid slots, I fitted a 50mn Microwarpdrive, which gives you a decent speed of over 1k m/s. The Drake is not capacitor stable with the MWD on, so you need to use it carefully to not run out of cap. However, since many missions require you to burn quite a distance in the missions pockets or the NPC are too far away for you to hit, this will save a lot of travel time. For tank, I fitted 3 Large Shield Extender II and 2 Adaptive Invulnerability Field IIs, with give you a nice shield buffer with good resists all over the resist profile.

In the low slots, we have 3 Ballistic Control System IIs to increase missile damage and a Shield Power Relay II. Together with the rigs below, this Shield Power Relay increases your shield regeneration rate to a point that is comparable to an active shield booster.  The passive recharge rate can be up to 82 HP per second depending on skills, which results in 275 EHP per second recharge rate. Combined with the shield buffer of 55.4 K EHP, this should easily get you through all missions. A tank that is based on shield recharge is actually called a passive shield tank, while a shield tank without regeneration mods is called a shield buffer tank.

In the rig slots, I fitted 2 Medium Core Defence Field Purger Is, which further increase shield recharge rate and a Medium Ancillary Current Router I, which provides some extra powergrid to make everything fit on the hull.

The fit is completed with 5 Warrior IIs to destroy smaller NPC ships like frigates or destroyers.

It goes for around 70 million ISK in Jita at the time of writing. This is quite a bit of cash considering the low payout of level one and two mission, but necessary to run level 3s missions smoothly.

The Skills

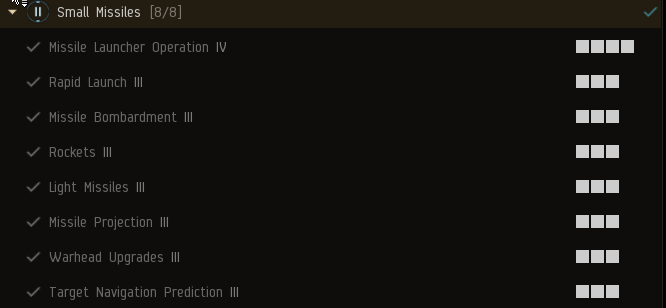
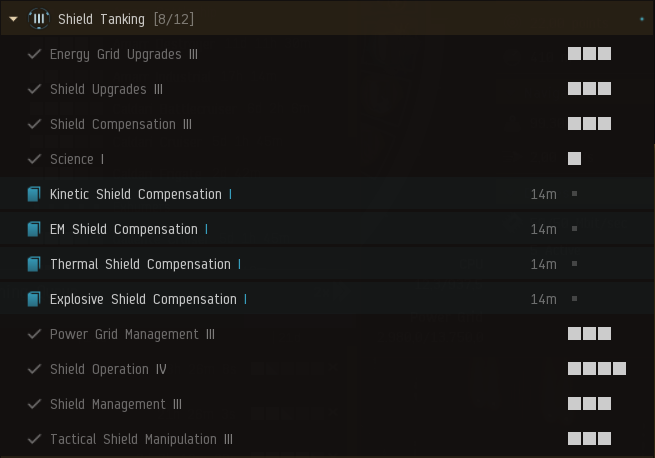
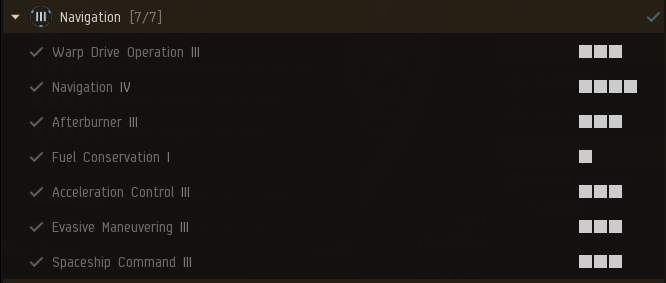
You will be able to use many of the skills that you trained for your Corax on the Drake fit. These are the shield tank modules (extenders and hardeners),  the Ballistic Control IIs and you will get bonuses for all the missile support skills. Furthermore, of course the core spaceship operation and navigations skills will apply too. What you need to train additionally, are Heavy Missiles and of course Caldari Battlecruiser. I would recommend to train these at least to level 3 and asap to level 4 once you have the time. Other than that, it would be good to keep training on the certificates I mentioned in the last part of this guide, maybe start to train into certificate level 4 for all of them.

Maximizing Damage and Tank

Starting from level three mission, it sometimes makes sense to optimise your damage and tank against the mission specific NPC faction. Every NPC faction has a weakness to a damage type, where it has the lowest resits. It also has a main weapon system which usually deals up to two main damage types to you.

NPC Damage types

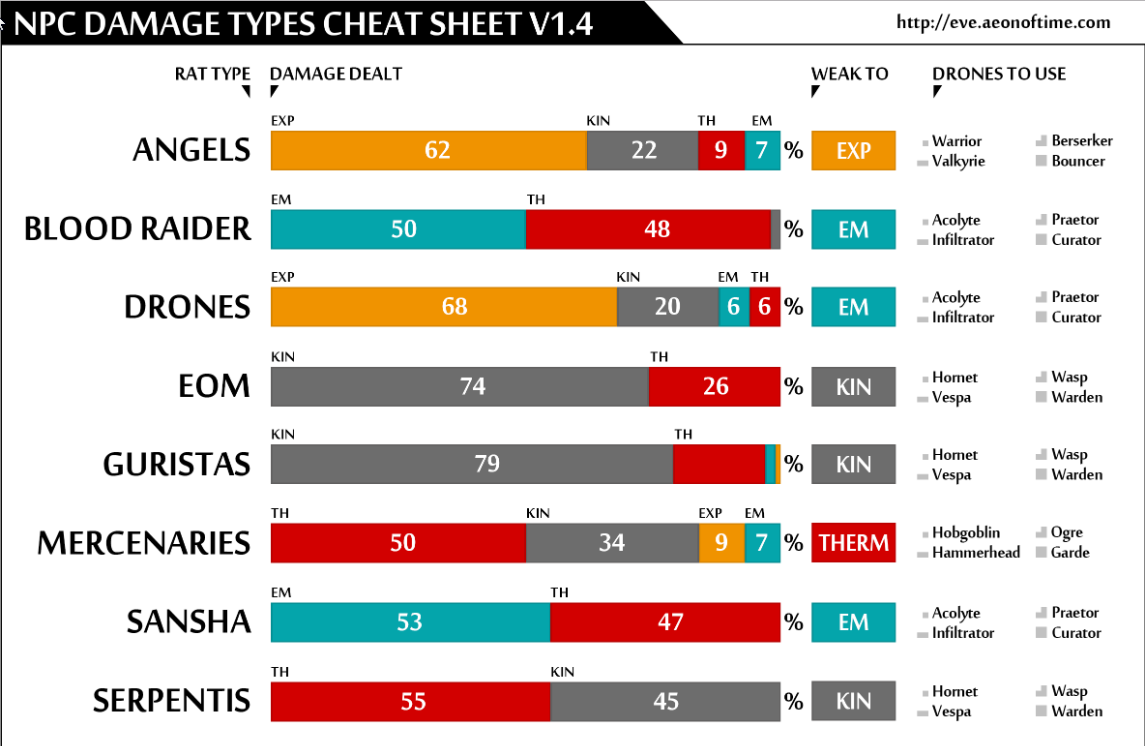
To max your damage, you can pick the right kind of ammunition for your launchers and swap your drones to deal the damage the NPC faction of the mission is weak to. How do you find out which damage type to deal in a mission? If you look up the mission on Eve Survival or on the Eve University page, the mission description will show you the damage type to tank against and which damage to deal.

Eve-Uni Mission Description

The above screenshot shows an Eve University mission description of a level 4 mission. You see that you should deal kinetic and explosive damage and tank against the same types.

These are the damage types of your missiles and drones:

Drone and Missile Damage Types

You can see that each drone and missile type deals only one specific damage type. For the above mission, I would bring kinetic damage, which are Hornet IIs and Scourge Heavy Missiles.  Most of the times the first listed damage type in the mission description is the lower NPC resist.

To max your tank, you can swap the Adaptive Invulnerability Field IIs against a damage type specific hardener. These are:

Specific hardeners

So for the mission above, I would fit one Kinetic Deflection Field II and one Thermal Dissipation Field II. If you fit these instead of the Adaptive Invuls, you will get 25% more resists for the two damage types. The other types will be lower, but the NPCs are not dealing these anyways.

If you really need to swap hardeners and drones for a mission highly depends on the mission, your skills and gear. For very combat heavy missions or if you have trouble finishing it, swapping will help a lot.

The same mechanic works for all drone and missile sizes btw, so you could also adjust your medium drones or rocket launchers.

Running the Missions

I ran a total of 21 level three mission to reach level four standings. The missions were mostly combat missions, with the odd courier mission in between. The couriers were very easy and only required a couple of m3 cargo space. I got one three part storyline mission that greatly increased my standings towards Transstellar Shipping, but did not give a training implant.

The Revelation did actually not shoot.

There were two missions that gave a significant hit to my Amarr faction standing that are marked red in the below stats. You will recognize many missions names from level one and two missions, and the level three versions are mostly similar, just with bigger NPC ships to fight.

These are my mission stats:

In average, I made 12.5 million ISK per hour, which is quite a bit more than for level two missions. The average completion time went up to almost 12 minutes per mission. Most missions happened in the same system or only one jump out, which was great since the Drake aligns and warps slowly.

That was pretty much it for level 3s. As mentioned earlier, these are just a stepping stone towards level 4s, which I will cover in the next part of this series.

Finally, level 4 agent unlocked!

Security Missions Part I

I want to wrap up my mission running series with the last and probably most commonly run type of missions: Security missions.

Security missions are given out by security agents and usually involve killing a large amount of NPC ships with your combat fitted mission boat. Security missions progress from level one to five with the usual standings requirements for mission agents. Level five mission agents can only be found in low sec and are designed to be run by groups of players, while level one to four missions can easily be done solo. In this guide, I will only cover level one to four missions, since these are the most commonly solo player-run levels.

Security missions are usually run in high security space, since the higher level missions require quite some expensive ships that you won’t risk in low or null sec for a couple of million ISK bigger payout.

Consider the lower level missions just as a stepping stone to level four missions, where the real ISK can be earned. To quickly advance through the lower tier missions I highly recommend to train the Connections and Social skills, which increase your standings and standing gain towards agents as described in this post. By this, you might have enough standings to quickly advance to level two and after a couple of missions even to level three security agents.

Level One Security Missions

The two lower level mission tiers are usually run in a frigate or destroyer. Especially level one missions are very easy and can be done in any more or less well fitted T1 frigate. Level two missions are a bit harder and require either good skills and a well fitted frigate or a destroyer.  If you have the ISK, most level two mission allow cruisers sized ships to enter, but this is not required to complete them. To keep this guide simple, I ran both levels in a PVE fitted destroyer, which worked great.

This is the Corax destroyer fit I used for level one and two missions:

The Corax got some more fitting room in one of the last patches and I thought why not give it a try.  I also picked the Corax to generally train into Caldari missile boats, which will come handy in the higher level security missions. Caldari ships are great for security mission running, since rockets and missiles can do 100% of the damage in a specific damage type, depending on the missiles you load. However, in the lower level missions this is not important, so I just stuck to Mjolnir rockets for all the missions I ran.

The above fit is a shield buffer, rocket and afterburner fit. It does 150 dps out to up to 18 km with meta 4 rocket launchers depending on skills. The speed is not great with 624 m/s but not horrible either. With the shield buffer and some speed tank from the afterburner, this fit can run every level one and two mission. The fit is completed by a Target Painter in the mid slots to increase damage application of your rockets and therefore indirectly increases damage. Another handy mid slot module is the Missile Guidance Computer I, which increases you rocket range when loaded with a Missile Range Script. By this, you can apply damage earlier and hence finish the mission faster.

To get enough standings for level two mission, I trained the Conncetions skill to increase my base standings towards TransStellar Shipping, the corporation I picked to  run my missions for. I didn’t put any thoughts into the corp selection, but just picked an agent that was close.

While training, I did 9 level one missions to reach level two standings, which resulted in the following statistics:

The average ISK/hour value was 2.13 million ISK/h, which is quite a pittifull payout. However, it only took about an hour to gain enough standing to unlock level two agents. I did not include bounties in the calculation, because the amount was below 100K ISK for all missions in total. There was also nothing worth to loot or salvage from the wrecks. All but one mission were in the same system or only one jump out.  The average completion time was 6.5 minutes per mission. I did not get any storyline missions since, I didn’t run 16 level one missions in total.

The missions itself are very straightforward and the UI does a good job to guide you to the objectives of the mission and what to do next to finish it. If you still have problems solving a mission, I recommend to check out the mission solution on Eve Survival, where all missions are described in great detail. Usually the objectives are to destroy all NPCs or get a certain item from one of the ships or structures in the mission pocket. The missions that require an item, can usually be done without destroying all NPC ships, which speeds up the process a lot. Again, if there are shortcut options, these are usually described on the Eve Survival page. Some missions are guarded by an acceleration gate, which restricts the entry to certain ship classes. However, all of the gates allowed destroyers to pass, so this wasn’t a problem for my Corax. The NPCs to fight in level ones are very weak and shouldn’t be a problem for even a brand new player.

I got two missions that required me to hack a container with a Civilian Data Analyser, but the hacking was so easy that it didn’t require any meaningful skills to finish it. If you want to know more about hacking, check out my hacking and exploration guide.  The analyser was provided for the mission, so no need to buy one in advance.

Level Two Security Missions

With a new agent available, I started to run level two missions for the same corporation in a nearby system. The amount of NPCs to fight in level two missions increases quite a bit. However, you will still fight mostly frigates and destroyers, which are easily defeated in the above Corax fit. There were very few missions that had too many NPCs to finish it in one go, but if you just warp off to a friendly station and repair your shield damage and warp back, you can still do these without investing in a bigger ship. I never had to warp out more than once during a mission.

The mission objectives were similar to level one missions, just with more NPCs to fight. However, I didn’t get any hacking missions from my level two agent.

I did get two mining mission though, which I simply declined to do, because I didn’t have a mining ship handy. If you use a turret based ship for your level two missions, you might just bring a single Miner I to refit to and mine the very small amount of ore with your mission boat.

I got one storyline mission which dropped a +3 learning implant which goes for around 5 million ISK in Jita, but the mission also hit my Amarr faction standing pretty badly.  This mission is marked red in the below mission stats.

Here are the statistic for all 28 level two missions I ran:

I didn’t calculate the NPC bounties for each mission but only counted the sum of all mission, which was 1.35 million ISK in total for running 28 missions. I did not loot or salvage any wrecks, since I still dealt mostly with frigates and dessies, which don’t drop anything of value.  The missions sites were zero to two jumps away from my agent and the average completion time was 6.5 minutes per mission.  In total it took me about 3 hours to grind my standing up to access level three agents and I made 5.3 million ISK / h in average. If you add the ISK for the training implant into this number, the payout increases to 7.1 million ISK / h.

Recommended Skills

To finish this first part, I just want to give you a short summary of what skills you will need to train, to more or less properly get through these two mission levels and build up for the higher level missions. Many players are not a great fans of the skill certificate system, but I think it does a good job to give a quick overview what skills are of use for a ship. Of course this also depends on the job you want to get done with your ship, but for new players it is still easier than reading up on all these skills and figure out what they do.

At first you should train Caldari Destroyer up to level 4 to fully use the bonuses of your hull.

To use your weapons properly, you should train into the Small Missiles certificate level 2, skipping only the light missiles skill.

To properly get the fit online on the hull, you should train the Core Spaceship Operation certificate to level 3 as fast as possible:

For the shield tank, you should train into Shield Tanking certificate level 3, without the compensation skill, which are useless for mission running:

Finally, to get some speed and agility for your ship, you should train the Navigation certificate to level 3, too:

These are a lot of skills and it will of course take some time to train, but you should get started with your training plan asap. All these skills will be needed for higher level mission ships as well, so your SP won’t be wasted. Try to train the lower levels first and the higher levels at the very last. Even with just 50% of the skill levels trained, you should be able to somehow get through the level two security missions.

And that’s it for the first part of my security mission guide. Stay tuned for the next part that will cover my experiences with security level 3 missions and some more tips and tricks to run them smoothly.